Most drivers think about paint, tires, and engine performance, but rarely give much thought to what’s happening underneath their vehicle. The undercarriage is one of the most structurally important and least-maintained parts of any car, truck, or SUV. It takes constant abuse from road debris, water, mud, and chemicals, yet most owners never inspect it until something goes wrong.
This complete guide explains exactly what the undercarriage is, what it does, what can go wrong, and how to keep it in good condition for the long term.
What Is a Car Undercarriage and Why Is It Important?
The undercarriage, also called the underbody or chassis underside, refers to the entire assembly of mechanical and structural components located beneath your vehicle’s body and passenger cabin. It sits between the road surface and the floor of your car, exposed to everything the road throws at it.
Its importance goes far beyond structural support. The undercarriage houses critical systems that directly control how your vehicle moves, stops, and handles. A compromised undercarriage doesn’t just affect appearance, it affects safety, driveability, fuel efficiency, and the long-term structural integrity of the entire vehicle.
Here’s why maintaining the undercarriage matters:
- Safety: Corroded or damaged suspension and brake components reduce vehicle control and stopping ability
- Longevity: Rust that starts on exposed undercarriage metal spreads to the vehicle’s frame and body panels over time
- Resale value: A rusted or damaged undercarriage significantly reduces a vehicle’s market value
- Performance: Worn suspension and steering components affect handling, tire wear, and ride comfort
- Fuel efficiency: Dragging components, misaligned suspension, and exhaust leaks reduce fuel economy
Simply put, what happens underneath your vehicle matters just as much as everything you can see above it.
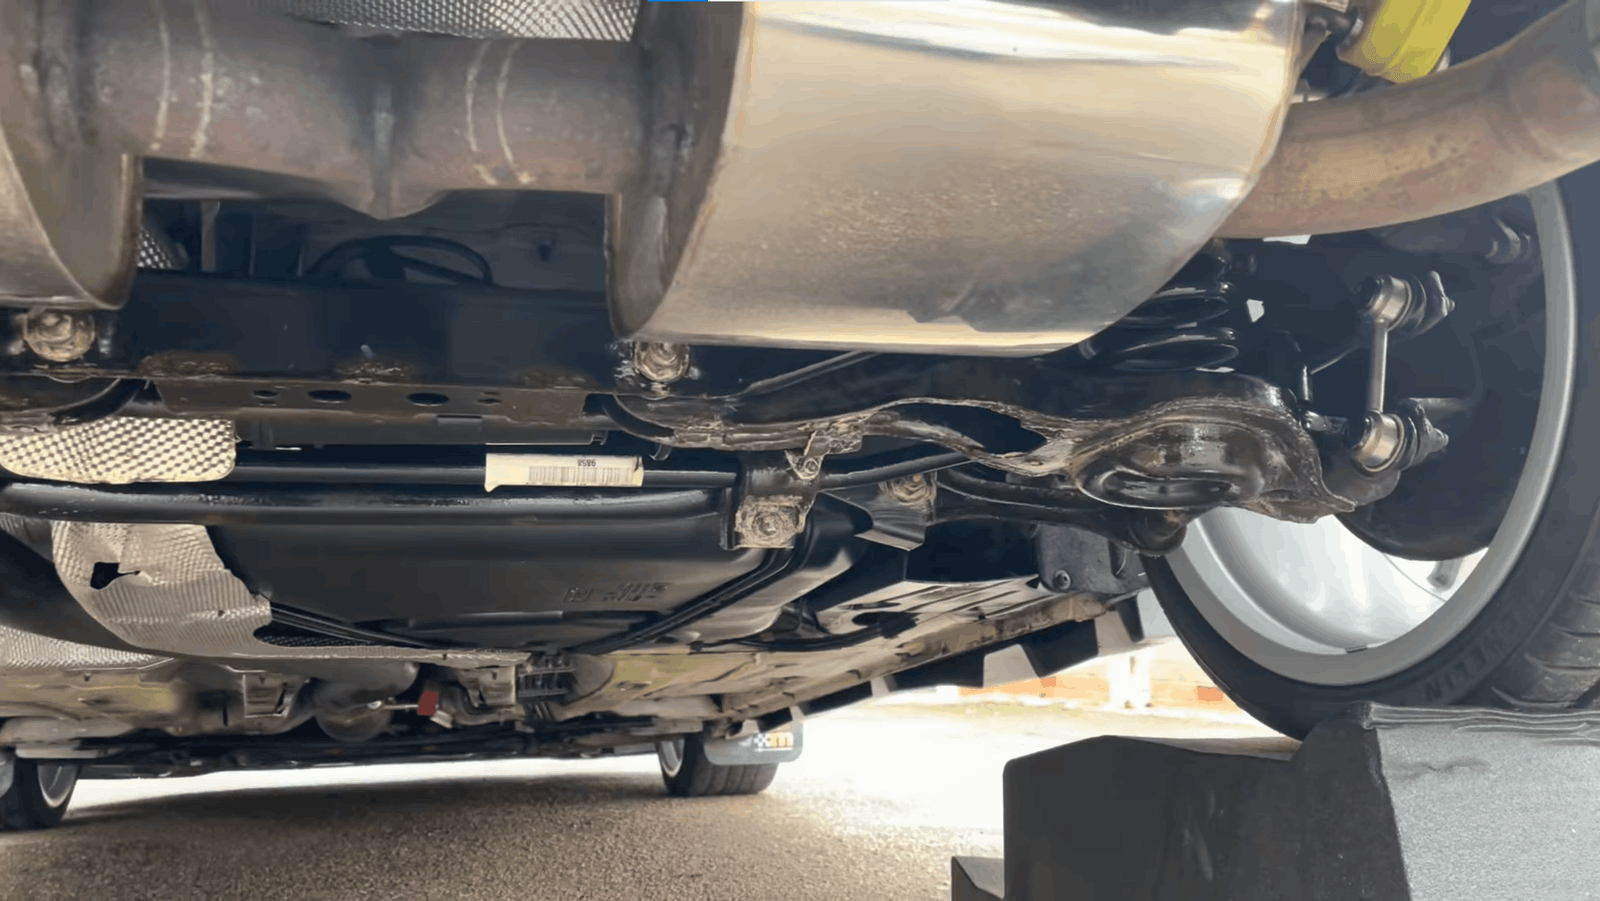
What Parts Make Up a Car’s Undercarriage?
The undercarriage is not a single component, it’s a collection of interconnected systems working together. Here’s a breakdown of the major parts:
Structural Components
| Component | Function |
| Frame / Chassis | The primary structural skeleton of the vehicle |
| Subframe | Secondary frame that supports the engine, transmission, and suspension |
| Floor pan | The metal floor structure that forms the base of the passenger cabin |
| Crossmembers | Horizontal structural braces that connect frame rails |
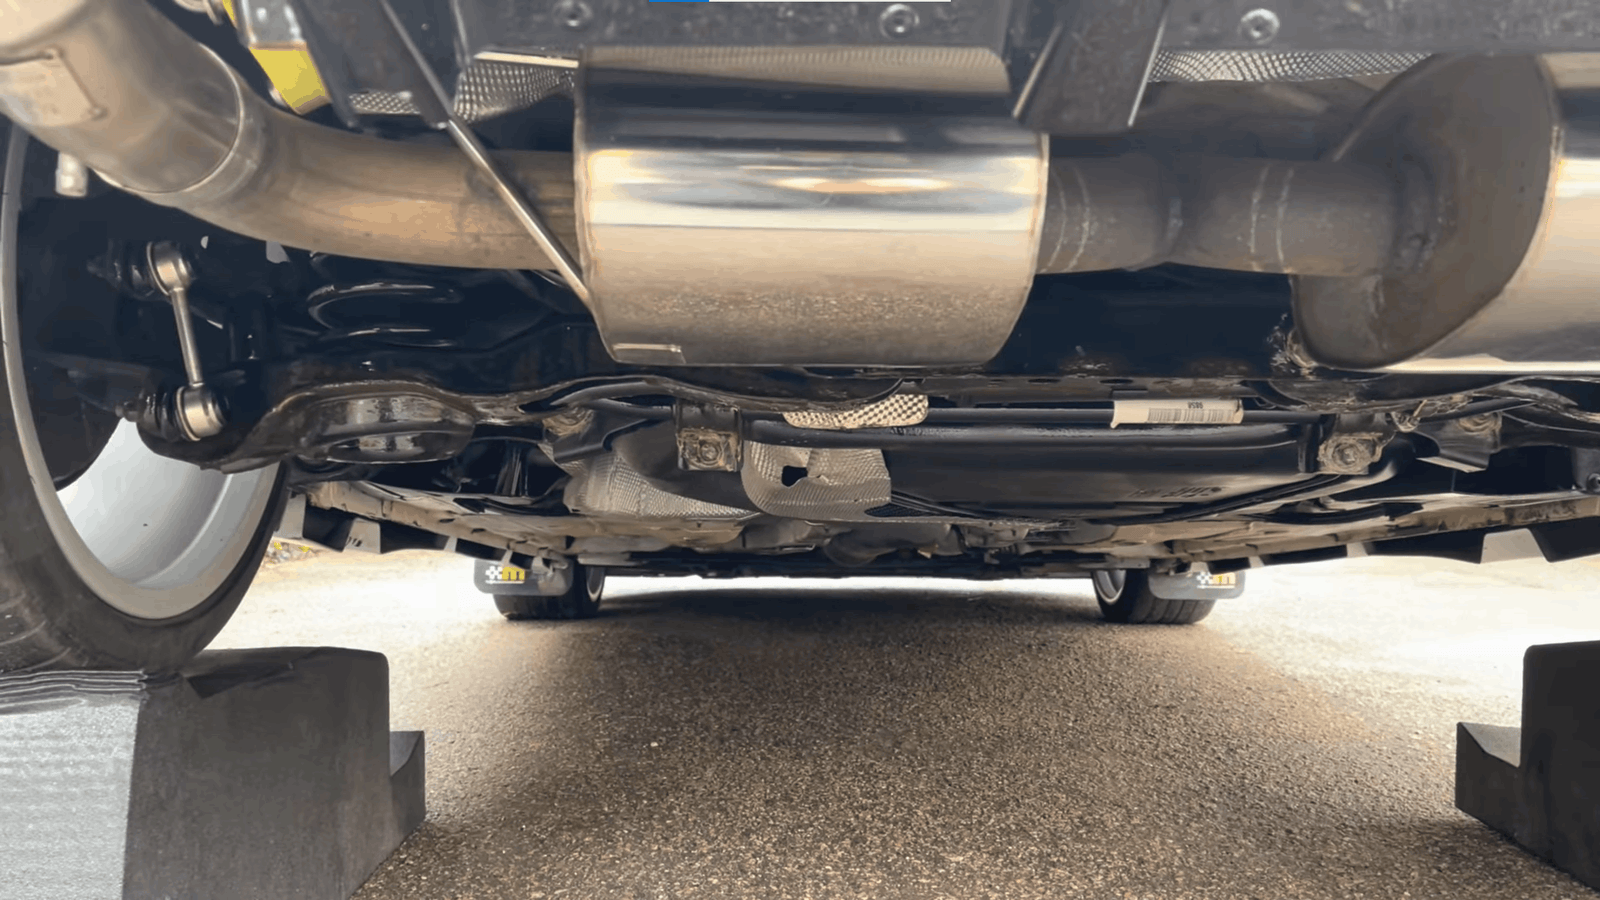
Suspension System
| Component | Function |
| Control arms | Connect the wheel hub to the frame and allow vertical wheel movement |
| Ball joints | Pivot points that connect the control arms to the steering knuckle |
| Shock absorbers | Dampen road impact and control body movement |
| Struts | Structural suspension components that combine shock absorber and spring functions |
| Coil/leaf springs | Support vehicle weight and absorb road irregularities |
| Sway bar (stabilizer bar) | Reduces body roll during cornering |
| Tie rods | Connect the steering rack to the wheel hub for directional control |
Drivetrain Components
| Component | Function |
| Driveshaft | Transfers torque from the transmission to the rear axle (RWD/AWD vehicles) |
| CV axles (half shafts) | Deliver power to the front wheels (FWD/AWD vehicles) |
| Differential | Distributes power between wheels while allowing them to rotate at different speeds |
| Transmission | Located partially in the undercarriage on many vehicles |
Exhaust System
| Component | Function |
| Exhaust manifold | Collects exhaust gases from the engine cylinders |
| Catalytic converter | Converts harmful exhaust gases into less toxic emissions |
| Resonator | Reduces exhaust noise before the muffler |
| Muffler | Reduces exhaust sound output |
| Exhaust pipes | Channel gases from the engine to the rear of the vehicle |
Fuel System
| Component | Function |
| Fuel tank | Stores fuel, typically located beneath the rear passenger cabin |
| Fuel lines | Carry fuel from the tank to the engine |
| Fuel pump (on some vehicles) | Pressurizes fuel delivery to the engine |
Braking System (Undercarriage Components)
| Component | Function |
| Brake lines and hoses | Carry hydraulic fluid to the brake calipers and wheel cylinders |
| Brake calipers | Squeeze brake pads against rotors to slow the vehicle |
| Rotors and drums | Rotating surfaces that brake pads or shoes press against |
| Parking brake cable | Mechanical cable connecting the hand brake to the rear brakes |
Every one of these components plays a role in your vehicle’s safety, performance, and reliability, which is exactly why undercarriage care deserves the same attention as any other part of your car.
Common Problems That Affect the Undercarriage
Several conditions regularly damage the undercarriage, especially in climates where vehicles face road salt, standing water, and rough driving surfaces:
- Rust and corrosion: The most widespread undercarriage problem. Road salt, particularly in Missouri winters, accelerates oxidation of exposed metal surfaces. Rust weakens structural components, causes brake line failure, seizes exhaust hardware, and compromises the frame integrity over time.
- Road debris impact damage: Rocks, gravel, potholes, and road debris strike undercarriage components with significant force. This can bend suspension arms, crack exhaust pipes, puncture fuel tanks, and damage protective undercoating.
- Worn suspension components: Ball joints, control arm bushings, and sway bar links wear out over time from constant road vibration and load cycling. Worn components cause clunking noises, uneven tire wear, and degraded handling response.
- Exhaust system deterioration: Exhaust components operate at extreme temperatures and are exposed to moisture and road spray. Rust, cracks, and broken hangers are common, resulting in exhaust leaks, excessive noise, and emissions failures.
- Leaking fuel or brake lines: Corroded or physically damaged fuel and brake lines are serious safety hazards. Brake line corrosion is particularly common in vehicles regularly exposed to road salt and deserves immediate attention when identified.
- Damaged undercoating: Factory undercoating, a rubberized protective layer sprayed on the undercarriage at the assembly plant, chips, cracks, and peels over time. Damaged undercoating exposes bare metal to moisture and salt, accelerating rust development.
If you notice any of these signs, schedule a professional undercarriage inspection without delay. Many of these issues worsen rapidly and become significantly more expensive the longer they go unaddressed.
Undercarriage Cleaning and Maintenance Tips
A clean undercarriage is easier to inspect and less prone to hidden corrosion. Here’s how to keep it properly maintained:
High-pressure undercarriage wash: Use a pressure washer or self-service car wash bay to blast mud, debris, and road salt from all undercarriage surfaces. Pay special attention to wheel wells, frame rails, and the area around the exhaust system where debris tends to pack.
Seasonal cleaning schedule
| Season | Recommended Action |
| Spring | Full undercarriage wash to remove winter salt accumulation |
| Summer | Inspect for rust, damage, and worn components |
| Fall | Apply fresh undercoating or corrosion inhibitor before winter |
| Winter | Wash undercarriage every 1–2 weeks after salt road exposure |
Professional undercarriage inspection: Schedule a lift inspection at a trusted service shop or detailing professional annually. A technician on a hoist can identify rust progression, leaking components, worn bushings, and damaged protective coatings that aren’t visible from ground level.
Lubricate moving joints: Grease fittings on ball joints, tie rod ends, and other suspension pivot points require periodic lubrication. Dry joints wear faster and are more susceptible to corrosion-related failure.
Use corrosion inhibitor spray: After cleaning, apply a corrosion-inhibiting spray to exposed metal surfaces. Products like fluid film or rubberized undercoating aerosols penetrate rust-prone areas and displace moisture to slow oxidation.
A consistent cleaning and maintenance routine is the simplest, most cost-effective way to add years to your undercarriage’s service life.
How to Inspect Your Car’s Undercarriage Safely (Step-by-Step Guide)
Inspecting your undercarriage doesn’t require a professional lift or mechanical expertise, but it does require the right setup and a methodical approach. Doing it safely and thoroughly gives you an early warning on rust, leaks, and worn components before they turn into expensive repairs.
What you’ll need:
- A hydraulic floor jack and jack stands (or a set of vehicle ramps)
- A bright flashlight or LED work light
- Mechanic’s creeper or a thick mat (to lie on)
- Protective gloves and safety glasses
- A plastic scraper or screwdriver (to probe rust spots)
- A garden hose or pressure washer (for pre-inspection cleaning)
Step 1 — Choose a safe, flat surface
Always work on a firm, level surface, a concrete driveway or garage floor is ideal. Never inspect under a vehicle supported only by a scissor jack or on uneven ground. The vehicle must be completely stable before you go underneath.
Step 2 — Clean the undercarriage first
A dirty undercarriage hides rust, cracks, and leaks. Before inspecting, rinse the underside thoroughly with a garden hose or pressure washer to remove mud, road salt, and debris. Allow it to dry for 15–20 minutes before getting underneath.
Step 3 — Raise and secure the vehicle
Use a hydraulic floor jack at the designated jack points in your owner’s manual, never jack under a random point on the frame or body. Once raised, place jack stands under the frame rails at each corner. If using ramps, drive slowly onto both ramps simultaneously and engage the parking brake.
Step 4 — Position yourself and your lighting
Use a mechanic’s creeper or thick mat to slide under the vehicle comfortably. Position your LED work light to illuminate the section you’re inspecting. Work systematically, front to back, left to right, so you don’t miss any area.
Step 5 — Inspect the frame and floor pan
Look for surface rust, scale rust, and rust-through holes. Use your screwdriver to gently probe any rust patches, soft or flaking metal that gives way under light pressure indicates deeper corrosion that needs professional attention. Check the floor pan for any holes, cracks, or deformation.
Step 6 — Check suspension components
Visually inspect control arms, ball joints, sway bar links, and tie rod ends for cracks, bends, torn rubber boots, and excessive corrosion. Look for grease leaking from torn CV axle boots, this indicates a boot failure that allows contaminants into the joint.
Step 7 — Inspect the exhaust system
Run your eyes along the full length of the exhaust, from the manifold connection at the engine back to the muffler and exhaust tips. Look for cracks, holes, rust-through sections, and broken or missing exhaust hangers. Black soot marks around pipe joints indicate exhaust leaks.
Step 8 — Check brake and fuel lines
Follow the brake lines and fuel lines from front to rear. Look for corrosion, kinking, physical damage, and any signs of leaking fluid. Brake line corrosion is a critical safety issue, a corroded line can fail without warning. Any weeping or staining along a fuel line requires immediate professional attention.
Step 9 — Look for fluid leaks
Check the underside of the engine, transmission, and differential for oil, coolant, transmission fluid, or power steering fluid leaks. Fresh fluid leaves wet, shiny patches. Old leaks leave dark, dried staining. Note the location of any leak and identify the fluid before lowering the vehicle.
Step 10 — Document what you find
Use your phone to photograph any rust spots, damaged components, or leaks you find during the inspection. This gives you a visual record to share with a mechanic and helps you track whether existing rust patches are progressing between inspections.
When to call a professional:
- Any rust-through on frame rails or structural crossmembers
- Brake or fuel line corrosion or leakage
- Cracked or severely bent suspension components
- CV boot tears with grease loss
- Exhaust leaks near the catalytic converter or manifold
A visual inspection every 3–6 months, combined with a professional lift inspection annually, gives you the most complete picture of your undercarriage’s condition.
How Much Does Undercarriage Repair Cost?
Repair costs vary widely depending on the component involved, the extent of damage, and the vehicle make and model. Here’s a general pricing guide:
| Repair Type | Estimated Cost Range |
| Undercarriage wash and inspection | $20 – $80 |
| Undercoating application (professional) | $100 – $500 |
| Ball joint replacement (per joint) | $150 – $400 |
| Control arm replacement (per arm) | $200 – $600 |
| Shock absorber replacement (per unit) | $150 – $350 |
| Sway bar link replacement | $80 – $200 |
| Exhaust pipe repair or patch | $100 – $300 |
| Muffler replacement | $150 – $400 |
| Catalytic converter replacement | $400 – $2,500+ |
| Brake line repair or replacement | $150 – $500 |
| Fuel tank replacement | $400 – $1,200 |
| Frame rust repair (minor) | $300 – $800 |
| Frame rust repair (major/structural) | $1,000 – $4,000+ |
In the Springfield, Nixa, and surrounding southwest Missouri area, labor rates generally run $50 to $95 per hour, more affordable than major metro markets, which helps keep repair costs at the lower end of these ranges for most standard jobs.
Final Thoughts
The undercarriage is one of the hardest-working and most overlooked parts of any vehicle. It handles structural load, road impacts, weather exposure, and chemical contamination every single day, yet most owners never look at it until a problem forces their hand. Regular cleaning, periodic professional inspection, and proactive rust protection are the three habits that keep undercarriage repair costs low and your vehicle safe on the road.
Whether you drive through Springfield, Nixa, Ozark, or anywhere across Missouri, protecting what’s underneath your vehicle is just as important as maintaining everything above it. Don’t wait for a clunk, a grind, or a rust-through to start paying attention.
FAQs
What Is The Undercarriage Of A Car?
The undercarriage is the collection of structural and mechanical components located beneath your vehicle’s body, between the road surface and the cabin floor. It includes the frame, suspension system, exhaust, fuel tank, brake lines, drivetrain components, and protective undercoating.
How Often Should I Clean My Car’s Undercarriage?
During winter months in regions with road salt, washing the undercarriage every 1–2 weeks after driving on salted roads is recommended. In other seasons, a thorough undercarriage wash every 1–3 months is sufficient for most drivers. Always wash after off-road driving or exposure to heavy mud.
What Causes Undercarriage Rust?
Road salt is the primary accelerator of undercarriage rust, particularly in regions that salt roads during winter. Moisture, standing water, mud, and road spray also contribute. Rust forms when exposed metal reacts with oxygen and moisture over time, and road salt dramatically speeds up this electrochemical process.
How Do I Know If My Undercarriage Is Damaged? A
Common signs include clunking noises over bumps, vibration through the floor or steering wheel, vehicle pulling to one side, exhaust smell inside the cabin, visible rust from the wheel wells, and uneven tire wear. A professional lift inspection is the most reliable way to assess undercarriage condition.
Is Undercoating Worth The Cost?
Yes, particularly for vehicles in regions with regular road salt use, off-road driving, or high-humidity environments. Professional undercoating costs $100–$500 and can significantly extend the life of metal undercarriage components by providing a moisture and salt-resistant barrier over exposed surfaces.
Can A Damaged Undercarriage Affect Safety?
Absolutely. Corroded brake lines, worn ball joints, damaged steering components, and exhaust leaks are all direct safety hazards. A compromised frame or chassis reduces the vehicle’s crash protection integrity. Undercarriage problems should never be deferred when safety-critical components are involved.
How Long Does A Car’s Undercarriage Last?
With proper maintenance, cleaning, and rust protection, most modern vehicle undercarriages are designed to last the full life of the vehicle, 15 to 25 years or more. Vehicles regularly exposed to road salt, off-road conditions, or flood water without proper care can develop significant undercarriage deterioration within 7 to 10 years.